
Getting in
SiteWalk Pro is invitation-only during the pilot. Nobody signs themselves up by accident, and everyone lands inside the right company.
- Your company gets a workspace — one company, one workspace, with its own properties, people and billing.
- The first person in is the company admin, and they invite everyone else.
- Invitations arrive by email with a button. The link works once and expires after seven days.
- No separate signup — a new person creates their account on the invitation screen itself.
- Open the intake link you were given (it isn't listed publicly).
- Enter the company name, your name, your work email, and tick the authorization box.
- Your workspace is created immediately and an invitation lands in your inbox — usually within a minute.
- Open it, choose a password, and you're inside as the company admin.
Nothing arrived? Check spam first. If it's genuinely missing, tell us — we can resend it.
- Open the email and press Accept the invitation.
- Enter your name as you want it to appear on issues and comments.
- New to SiteWalk Pro? Set an email and password on the same screen. Already have a login? It just joins you.
You'll land on the properties you were given — if it looks empty, your manager hasn't put you on one yet.
Properties
A property is the unit everything hangs from: its own map, its own issue log, its own line on the invoice — however many buildings stand on it.
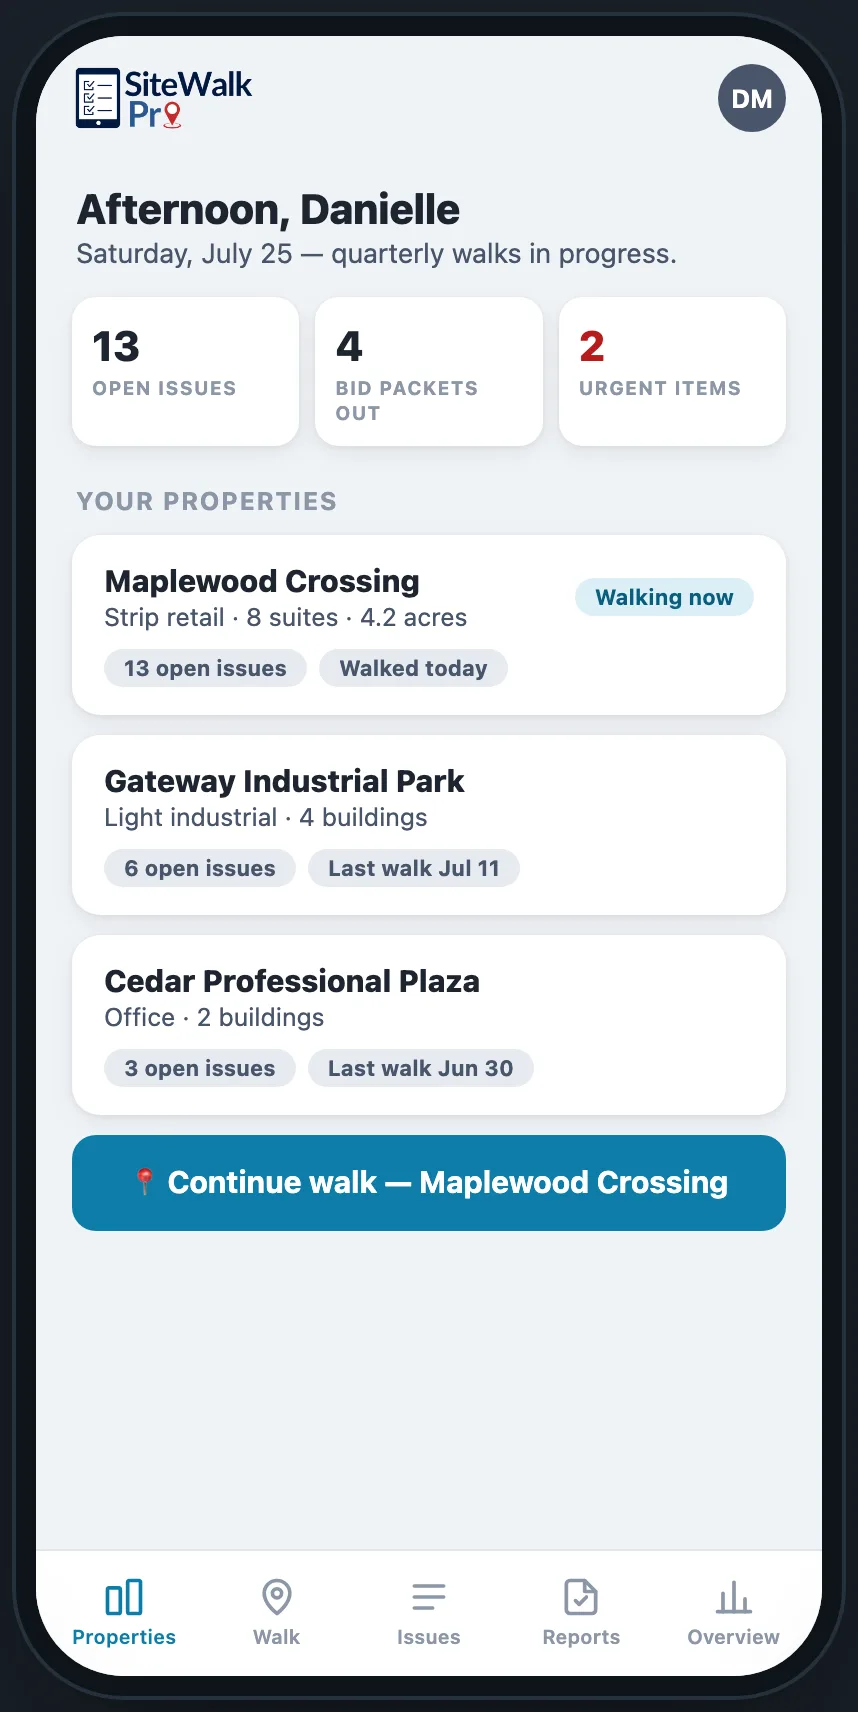
- “Up next” leads the home screen. One card names the single thing most worth doing right now — urgent items waiting on a decision, an RFP a vendor has held for 10+ days with no movement, or a fresh walk’s issues ready to become packets — with a button that takes you straight there. Nothing pressing, no card: a quiet home screen is good news.
- Company admins add properties. Everyone else requests one, and the admin approves it.
- An address is required, because it's how the satellite photo finds the site.
- The aerial photo arrives automatically when the property is created.
- Buildings within a property — "Main store", "Fuel centre", "Garden centre" — so an issue records which one it's on.
- Several street addresses per property, for sites that have more than one.
- Owner entity with phone and email, which prints on bid packets and budget requests.
- A site plan can replace the satellite view — upload a drawing or a drone shot when aerial detail isn't enough. Once uploaded, the plan becomes the property’s default view: the walk map opens on it and the property card shows it, with the aerial one tap away. Your last aerial/plan choice is remembered per property on your device. The property card shows the whole plan, letterboxed — never a zoomed crop. Uploaded the wrong file? ✎ Edit → “Remove the site plan” takes it off and the aerial leads again.
- Company admins can delete a property — from the property's ✎ Edit sheet. One with issues on it asks you to type its name first; everything goes to Recently deleted for 30 days, pins and photos included. Billing counts the month's peak, so removing a property mid-month doesn't change the current month.
- On the Properties tab, press + Add property.
- Give it a name and a street address, then save. The aerial photo is fetched for you.
- To adjust the framing, press 🛰 Update aerial on the property card.
- Search the address — a wide view appears, about a kilometre across.
- The map opens about 1.3 km across, so even a large property fits at first sight. Drag to move, pinch or scroll to zoom until the screen shows exactly the ground you want — the readout underneath tells you how wide your frame is.
- Press Save this view. That frame is what your team will pin on.
Include everything you'll want to pin — a fuel pad or an outparcel outside the frame can't be marked later.
- Open your account page (your initials, top right).
- Find the person in the team list and press Allow property setup.
- They can now add properties and addresses — and nothing else. No power over people or roles.
Revoke it the same way when the portfolio is loaded.
The walk
Walking the site is the part that has to work with cold hands and one thumb. Tap where you are, say what you see, photograph it, move on.

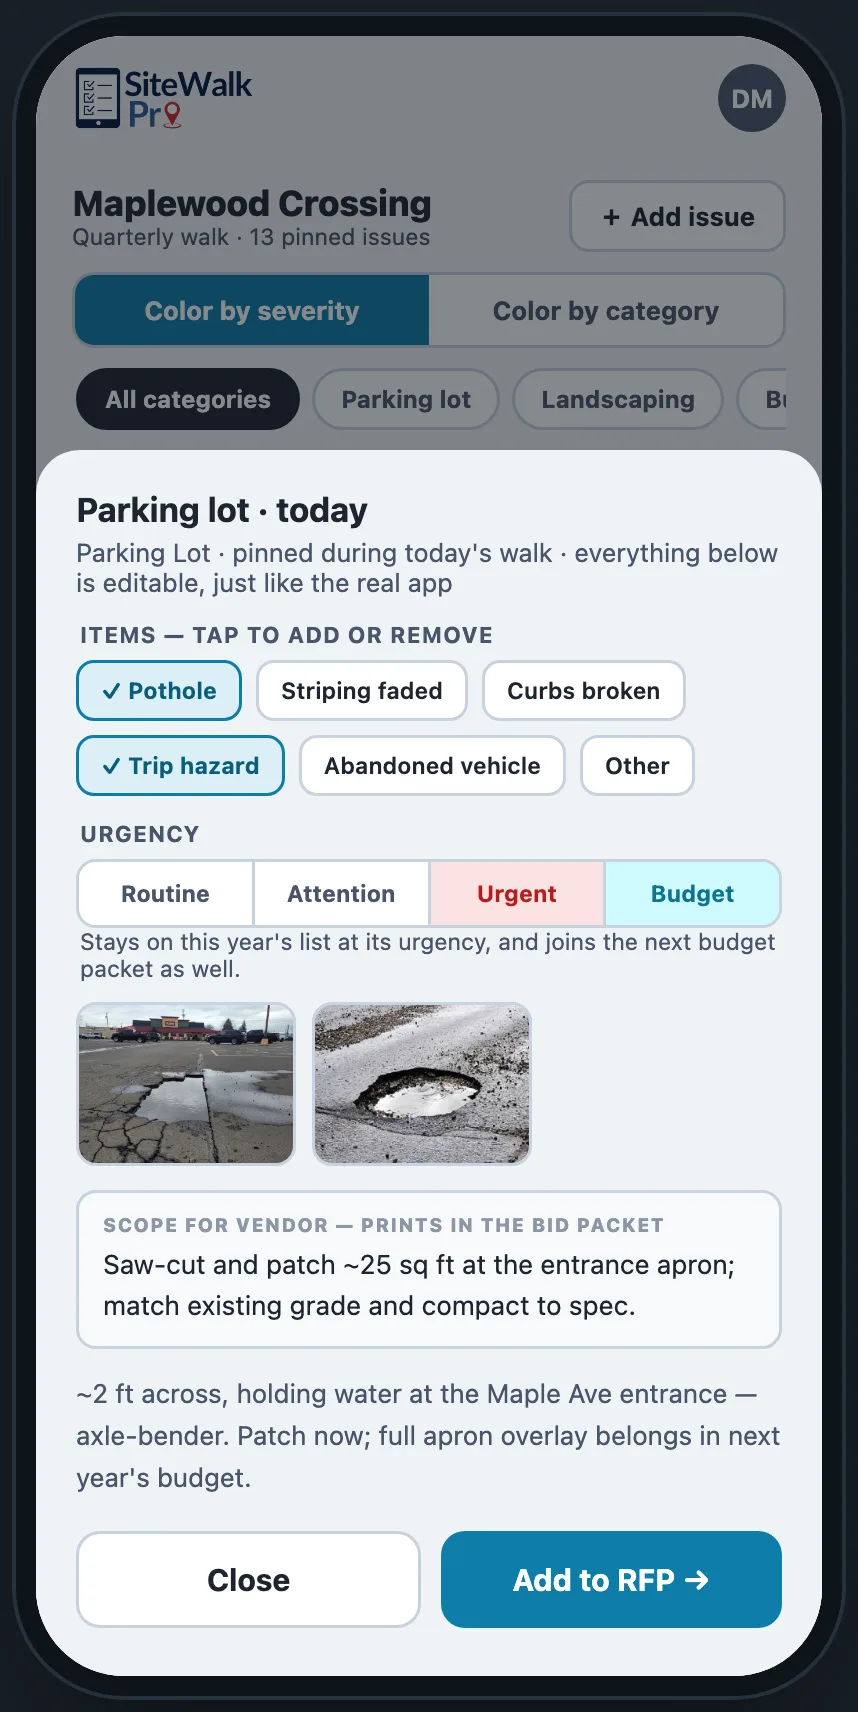
- Tap the map to drop a pin — no mode to switch into first.
- 13 categories and 158 preset items, grown from a working property manager's own list — and every category ends with an "Other" for the thing no preset covers; your note carries the specifics.
- Several items on one pin — "wall pack, soffit lights, light timers" is three things to price, one location.
- Up to twelve photos per issue, shrunk on your phone before upload so they go quickly.
- Two faces of one property — when a site plan has been uploaded it opens first, with 🛰 Aerial view / 📐 Site plan buttons above the map to swap; your choice sticks per property on your device.
- GPS is captured automatically — from the tap when you pin on the aerial, or from your phone standing at the spot when you pin on the site plan — with a Navigate link out to Google Maps.
- Each view shows its own pins. A pin drawn on the aerial has no true spot on a drawing, so the site-plan view lists it under “Not on this view” instead of guessing — switch to the aerial to see it, or use Move pin to place it on the plan.
- Pinch, scroll or double-tap to zoom the map, and drag to pan. Pins stay finger-sized however deep you zoom, so the mark never covers the spot you're aiming at.
- The property you pick follows you — choose it on any tab and Walk, Issues, Bids and Overview all open there, on that device, until you pick another.
- Date identified is editable — a Tuesday walk typed up on Wednesday still belongs to Tuesday.
- Pins can be moved afterwards, and issues logged indoors can be placed on the map later. A moved pin belongs to whichever view you drop it on.
What a walk actually finds
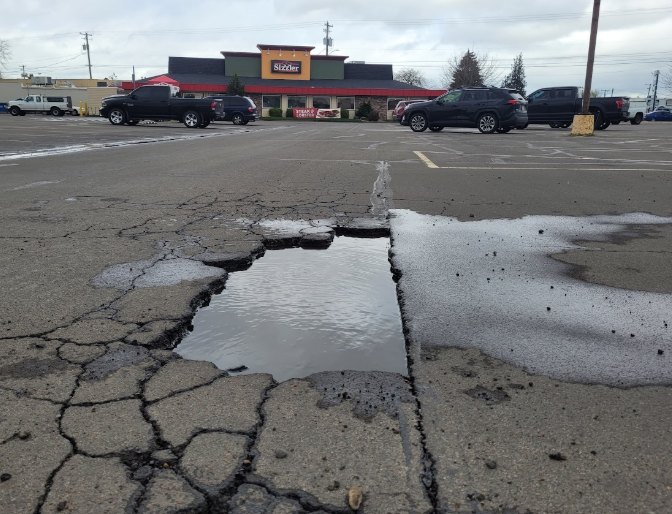
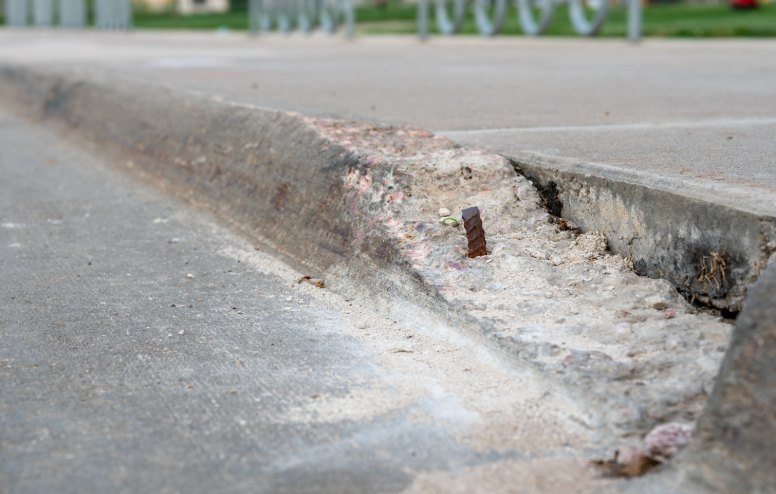
These are real issues from our own walks — the same photos that drive the live demo. Every issue there carries one, pinned where it was found, exactly as yours will.
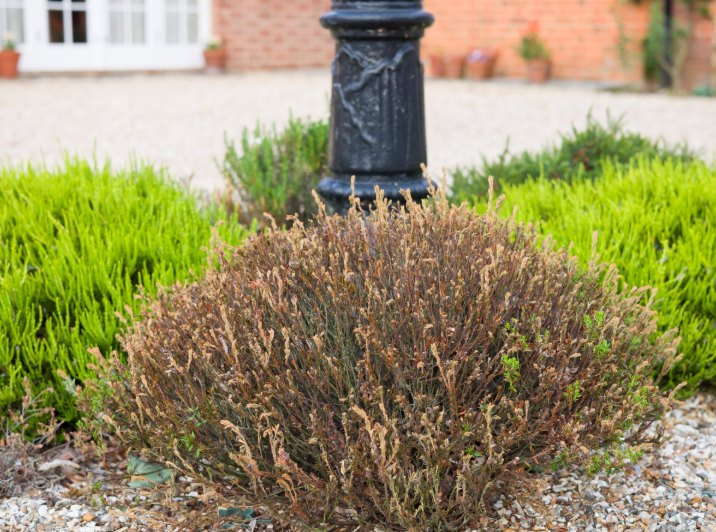
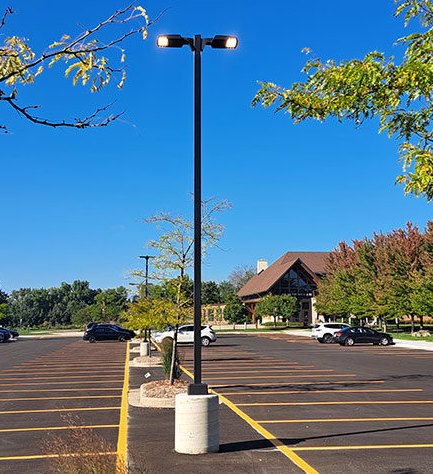
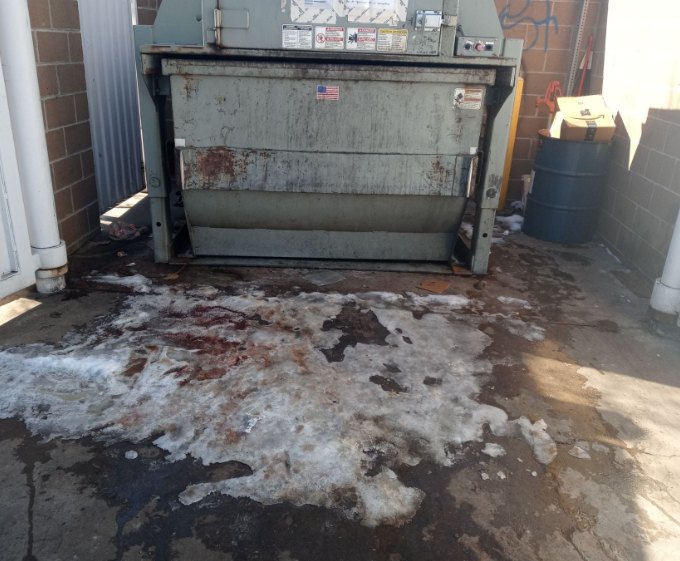

- Open the Walk tab and pick the property.
- Tap the map where the problem is.
- Choose a category, then tick the items you can see.
- Set the urgency — and tap Budget, the fourth button on the same row, if it also belongs in next year's capital plan. Budget combines with any urgency.
- Add Scope for vendor if you already know what you want priced, and Optional notes below it for anything the preset items don't say.
- Add photos, then Save issue.
Several problems at one spot for different trades? Use Save & add another here — it keeps the pin, the coordinates and the date, and clears the rest.
- The two views are different pictures, so a pin only draws on the view it was placed on. The app never guesses a spot on the other one.
- On the aerial, pins sit at their true GPS coordinates — including pins made on the site plan, because your phone recorded where you were standing when you dropped them.
- On the site plan, pins sit exactly where they were drawn. Pins made on the aerial appear in a “Not on this view” list below the map instead — a drawing has no coordinates to place them by.
- To give a listed pin a spot on the current view, open it and use Move pin. It then belongs to this view too.
If a pin ever seems to “stay in the same place” when you swap views, it’s a pin from before this change — pins made from now on always know which picture they belong to.
Inside an issue
An issue is identified by its category and the date it was found — not by a number nobody can remember.
Urgency, and the budget flag
Routine Attention Urgent Budget
Budget is the fourth button on the urgency row — it sits beside urgency rather than replacing it — an issue can be urgent and belong in next year's budget. On the map, that's a coloured pin with a cyan ring.
Everything stays editable
- Items can be added or removed after the fact — open any pin and the same preset menu appears with the issue’s items checked; tap to add what you missed or remove what doesn’t belong.
- Urgency and the budget flag can be changed anytime — a Routine that turned out to be Urgent takes two taps, and the change is recorded on the issue’s timeline with who made it.
- Scope and notes stay writable, and pins can be moved — nothing about an issue is frozen the moment it’s saved.
The seven statuses
- New → Reviewed → Bid requested → Scheduled → Work Completed → Work Verified → Closed
- Closed leaves the map and the issue log but stays in the Overview, so history survives.
- Site staff can move a status but can't verify, close, or change the details of an issue — enforced by the database, not just hidden in the interface.
- Everything is editable when you open it — no edit mode. The category's full item list is shown with the issue's own items ticked, so adding the thing you missed is one tap, and Save and Close ride a bar at the bottom of the screen the moment something changes.
- Scope for vendor is what you want priced; Optional notes sits below it and prints on the packet, under the scope, only when it says something.
- Issue Tracking Activity keeps every status and urgency change with who and when, plus internal notes that never leave the app.
- Assign an issue to a teammate, and they're emailed.
- Deleting is recoverable for 30 days. An issue, a photo, or a whole property with everything on it goes to Recently deleted on your account page, and restoring puts it back exactly as it was — same pins, same photos, same history.
- Open your account page — your initials, top right.
- Find Recently deleted. It shows what it was, what came with it, who deleted it, and how many days remain.
- Press Restore.
Company admins see everything deleted in the company; everyone else sees what they deleted themselves. After 30 days it's genuinely gone, photos included.
The issue log
Every issue ever logged — the property's history, filterable down to what you need.
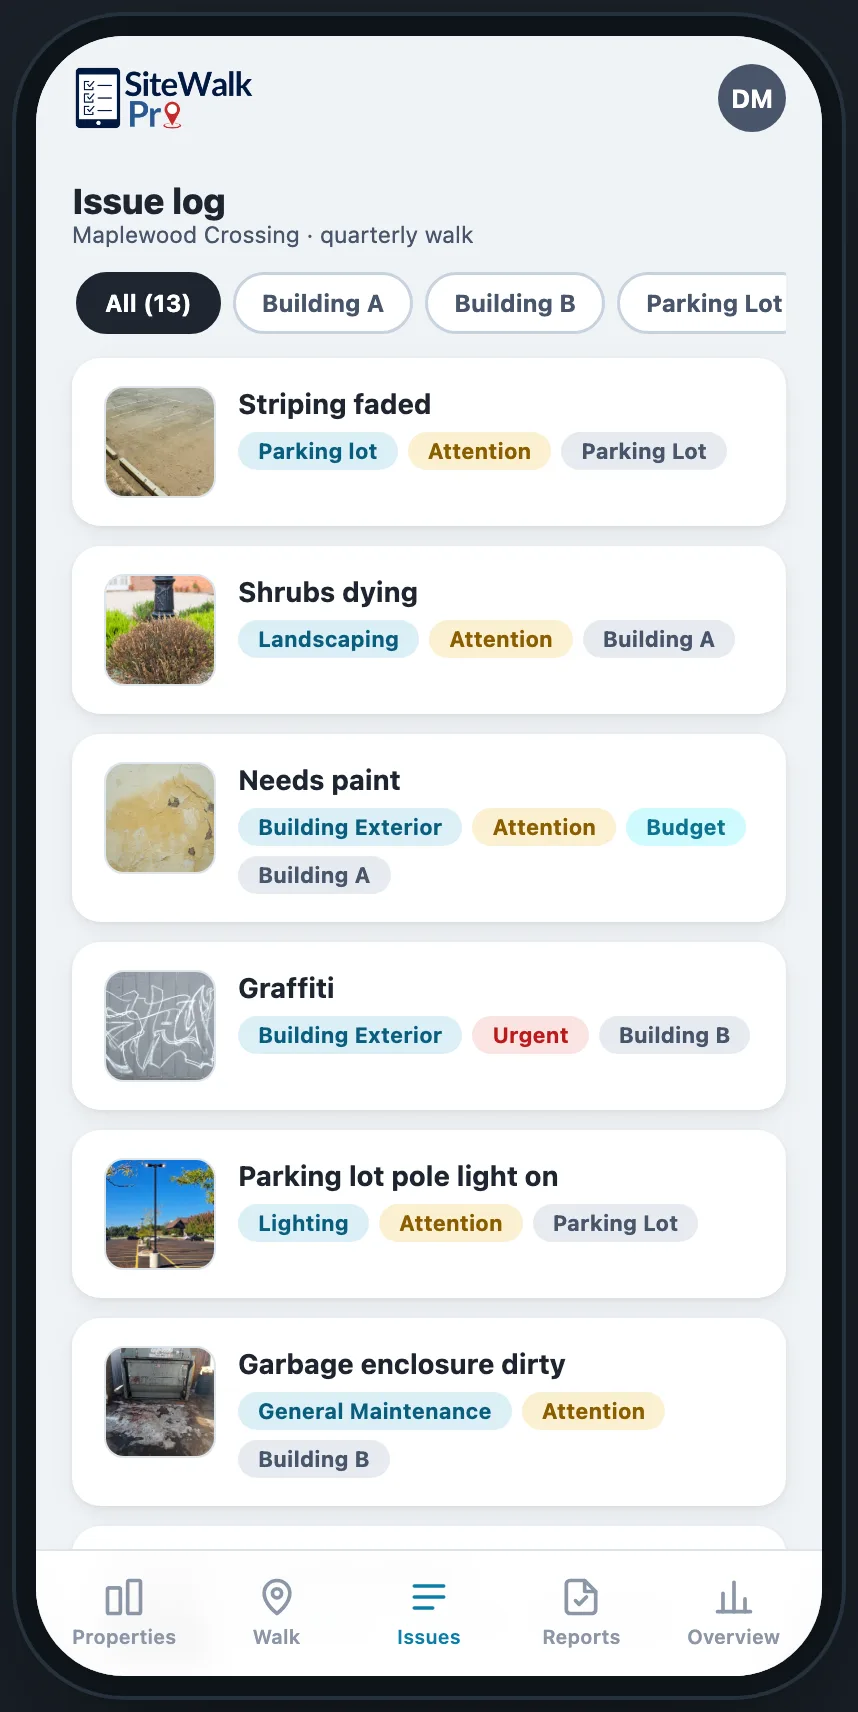
- Search titles and notes.
- Filter by property, status, urgency, category, budget flag, or just the ones assigned to you.
- Open is the default view; All includes finished work.
Documents
This is where a walk turns into paperwork somebody else can act on — the reason the app exists.
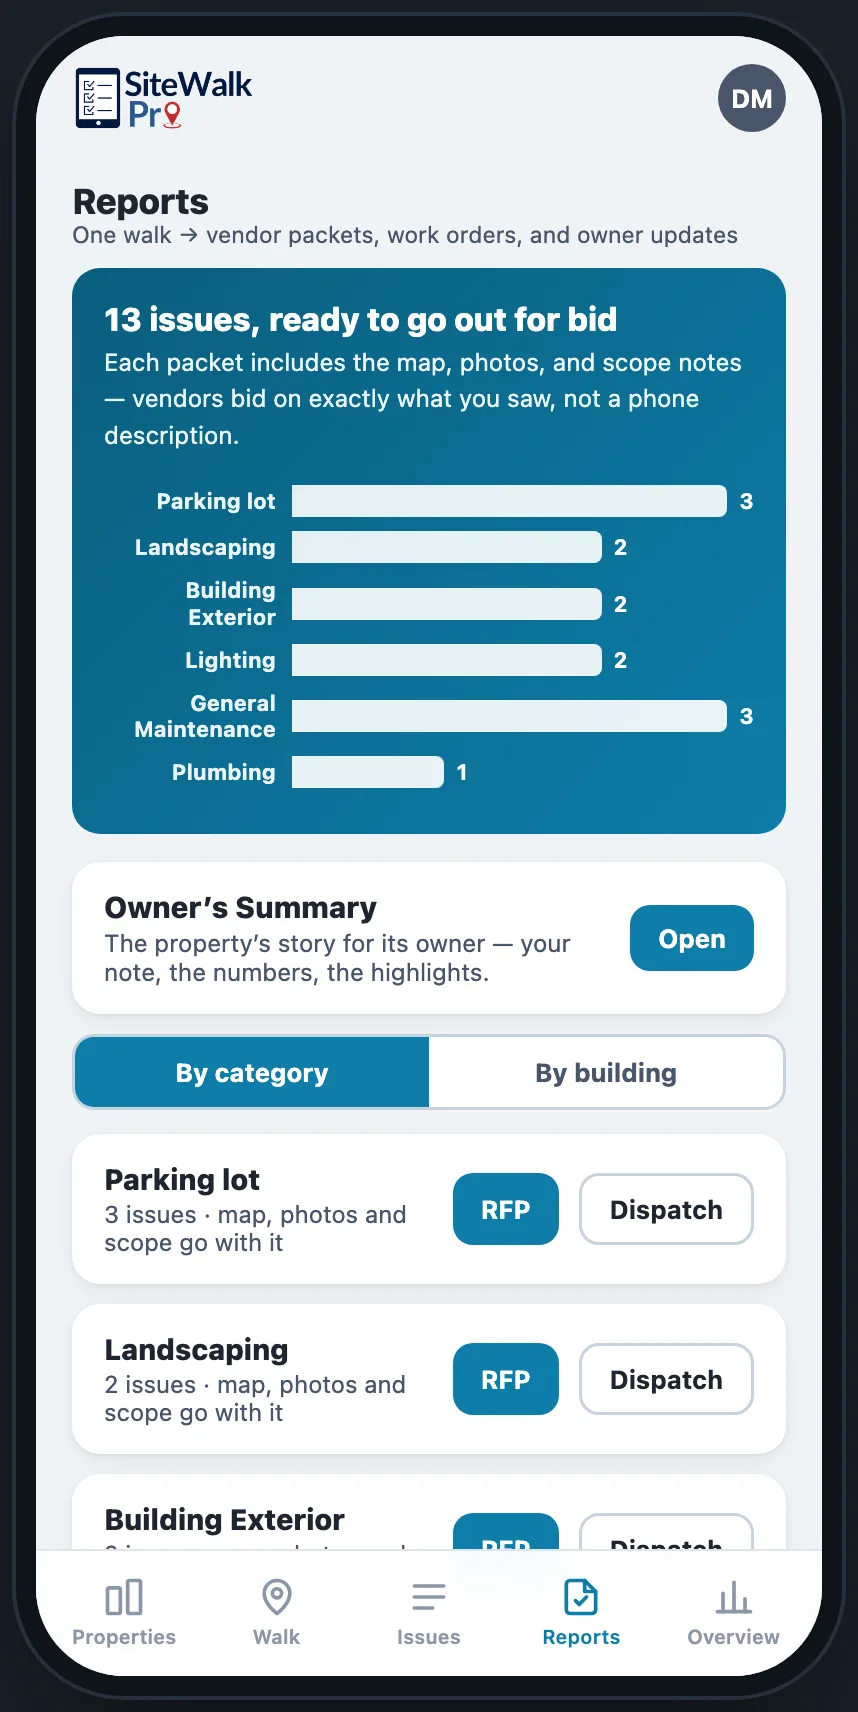

Bid packet
- One packet per category, so each vendor gets only their own work — and two buttons on every category: RFP asks vendors for itemized pricing; Dispatch is a Work Order that says "please address the following at your earliest convenience," swaps the date field to Complete by, and marks the issues Scheduled instead of Bid requested.
- Laid out as a formal Request for Proposal — a serif masthead with your company logo and company name that repeats at the top of every printed page, and "Page 1 of 5" page numbers on every sheet of the PDF. A company admin adds the logo once under Account → Company logo; it then prints on every RFP, work order, Owner’s Summary and budget packet.
- The Request paragraph is editable. It arrives pre-written from the packet itself — RFP or work order, how many items, which walk, which property — and follows those choices until you type in it; once you’ve edited, your words stay put and print exactly as written, just like the Note to Ownership.
- A summary block up front: property, owner, address, your name with email and phone, and an optional "Proposal needed by" date you set from a date picker before exporting.
- A pin map of just that category's items, numbered to match the list, in a closing Location section with each pin's coordinates spelled out. The map shows the whole site by default with a Zoom to pins option, and issues on the same spot share one marker carrying their item numbers ("2,5–6"), never a bare count. The aerial prints whenever every pin in the packet has GPS — placed from the GPS, so vendors see true ground positions — and the site plan prints with the drawn positions otherwise.
- Every item with what was seen, the scope, photos and GPS.
- Filter to one walk date — "the three landscaping issues from the 30 July walk".
- Print or PDF — page numbers, brand fonts and the pin map all carry into the file you email.
- "Mark sent" records who the packet went to. Pick the vendors from your own directory (several at once for competing bids), set the date it actually went out, and the issues are marked Bid requested in the same step — recorded under the name of whoever sent it. Downloading alone never marks a packet sent.
- Point of contact. The letterhead’s Requested by can be any teammate — it defaults to you, and a PM building a packet the assistant will send can flip it so the vendor replies to the person who’ll actually field the call. Separate from the send record, which always carries the sender’s own name.
- Vendor directory (Account → Vendors) — your own rolodex: company, contact, email and phone, tagged with the categories they cover. The send sheet offers the matching companies and can add a new one on the spot, so the directory builds itself while you work. Tag a vendor Regular vendor at… a property and they list first with a ★ when sending from there.
- Open the Reports tab and pick the property. It opens with a Documents card — Owner’s Summary and Budget packet — with bid packets below. Choose RFP for competing quotes or Dispatch to send a vendor straight to work.
- Choose the category — landscaping, lighting, parking lot.
- Press Packet. Optionally narrow it to a single walk date, and set a Proposal needed by date if you want the deadline printed in the summary.
- Untick any issue you'd rather hold back — it dims and won't print. Need something from another category? + Add an issue from another category pulls it in, pins and all.
- Click any photo you'd rather leave out. It dims, and it won't print — it stays on the issue.
- Press PDF and email it to your vendor.
- Press Mark sent…, tick the vendors it went to (or add one right there), confirm the date — the send is recorded with your name and the issues move to Bid requested.
Photos print two to a row at half-page width so they're easy to see. Print and PDF include every photo still showing.
Owner's Summary
- One page that tells the owner everything — the walk's highlights with photos, each issue's scope and notes, and open issues by category.
- Pick the walk — or all of them — the date picker covers a single inspection or All walks, and the checkboxes decide what makes the report either way.
- A pin map closes the report — the property’s aerial or site plan with numbered pins matching the numbered highlights, colored by urgency. The aerial prints when every included pin has GPS; otherwise the site plan prints with the drawn positions.
- A Note to Ownership — your own message to the owner, printed under the Summary block. It arrives pre-written (“A property inspection was completed on…”) and follows the selected walk date until you edit it; once you've typed, it's yours and stays put. Prints exactly as written.
- Every highlight carries its recommendation — Scope for vendor and Optional notes print with each issue, so the owner sees both what was found and what the team proposes to do about it. Empty fields simply don't print.
- The whole summary is yours to compose — untick any highlight to hold it back, and + Add an issue to this summary pulls in anything else on the property, budget-flagged items listed first — this is where the fund-the-permanent-fix case gets made.
- Photos are yours to choose — click any photo to leave it out of the summary; it stays on the issue.
- Find it on the Reports tab (Bids grew up and got renamed) — the Owner summary card sits above the packet list.
Budget request
- The annual capital ask, addressed to the owner, built from everything you flagged Budget.
- Recurring problems are flagged — logged twice or more, which is the argument for permanent repair over repeated patching.
- Estimate lines for a vendor to fill in.
Building report
- Everything open at one building on a property, for a walkthrough or a handover.
Inspections: move-in and move-out
A condition record for a suite or an apartment unit, room by room, so the move-out is a comparison against the move-in instead of an argument. This is a module we switch on per company; if you don't see an Inspect tab, ask us.
Floors and spaces
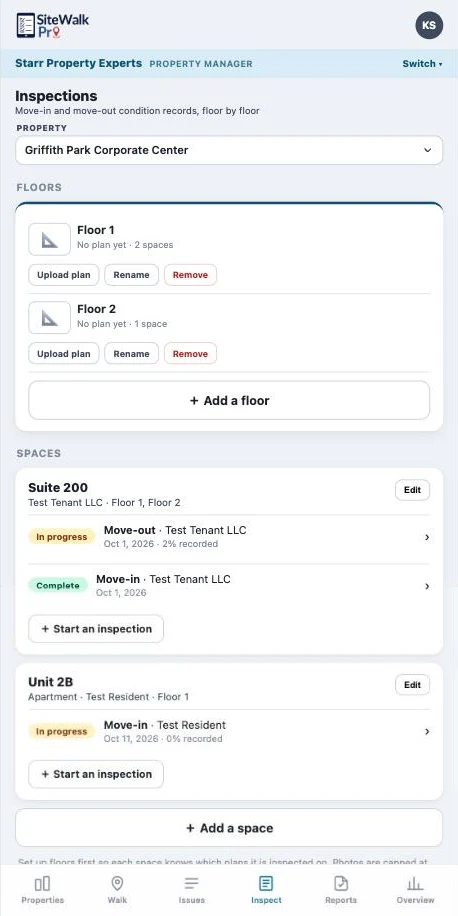
- Floors come first. Add Floor 1, Floor 2, a basement, and upload a floor plan for each (a photo of the leasing plan is fine). Spaces are inspected on these plans; a floor without a plan still works, there is just nothing to pin on.
- A space is an office or retail suite, an industrial suite, or an apartment unit. Pick which when you add it. The kind picks the default checklist and the words around it: a suite has a tenant, a unit has a resident.
- Tick the floors the space is on. A two-storey suite or a townhome gets its per-floor sections (bathrooms, bedrooms, halls, safety devices) listed once for each floor. A space on one floor reads as a single list with no tabs.
Starting one
- Move-in, move-out, or vacancy check. A move-out picks the move-in it compares against; the latest completed one is offered first. A vacancy check is the marketing walk of an empty space: is it clean and in show condition, mechanical on and set, restrooms stocked, brochures out, key in the lockbox. No occupant, no baseline, Good means confirmed.
- A contact name and email can be recorded on a move-in or move-out, and print on the report.
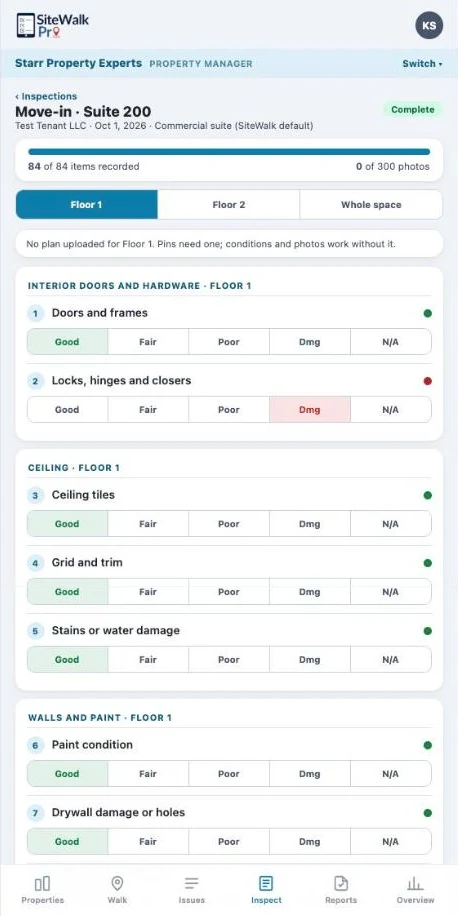
- Four checklists are included: Commercial suite (entry and storefront, doors, ceiling, walls, flooring, lighting, HVAC, electrical, restrooms, break room, fire and life safety, windows, back of house, tenant improvements, keys and meters), Industrial suite (exterior, loading dock, interior, restrooms and breakrooms, warehouse, life safety equipment, building equipment such as generator, boiler, telecom and roof access, keys and meters), Apartment unit (entry, living and dining, kitchen appliance by appliance, bathroom, bedrooms, halls and closets, laundry, heating and water heater, smoke and CO detectors, patio and storage, keys and meters) and the Vacancy check. The right one is chosen from the kind of space and inspection; you can switch.
- The checklist is copied into the inspection when it starts, so a later change to a template never rewrites a record you already signed off on.
Recording it
- One tap per item: Good Fair Poor Damaged or N/A. Everything saves as it is tapped; there is no Save button to lose a walk to.
- A note, photos and a pin. Say what and where, add photos (compressed on the phone, up to 300 per inspection), and tap the floor plan to pin the item. Numbered pins match the numbered list.
- The move-in travels with you. On a move-out, every item shows the move-in's grade and note right under the buttons, and its move-in photos when the item is open, so the comparison happens in the room. Copy move-in grades to unrecorded fills every item you haven't touched with the move-in's grade; Mark the rest Good does the same with Good. Then you change only what got worse.
- Estimated charge on a move-out, per item, so the deposit letter has its numbers before you leave the unit. Tick Normal wear, not charged on anything that is worse than move-in but is fair wear: it stays on the record and off the bill.
- Mark complete when every item has a condition. A manager can reopen it if something was missed.
- Contents handed over. A move-in lists what the tenant receives with the space: desk, chair, file cabinet, trash can, coat hook, door key, file cabinet key, key fob, each with a count and a replacement cost. Change a cost for one tenant, or add something that isn't on the list. The move-out shows what is expected back, takes the count returned and the count damaged, and flags anything short.
- Changes since move-in. A key replaced, a second chair added, a trash can swapped: log it on the space while the tenant is in. The move-out expects the new counts, and a replacement with a cost goes on the deposit statement.
- Signatures. Once complete, the property manager and the tenant or resident sign on the phone with a finger, directly under the deposit disclosure: the wording that says missing or damaged contents, unreturned keys and damage beyond normal wear come out of the deposit. The wording is saved with the record the moment the first signature is taken. The name and time are kept with the signature, and all of it prints on the condition report and the deposit statement. An unsigned report prints a line to sign on paper.
- Your own list and wording. Under Account, a manager edits the company's contents list and prices and the disclosure text. A coworking operator hands over monitors; an apartment manager hands over a garage remote. Every move-in started afterwards copies the list as it stands then.
The comparison and the reports
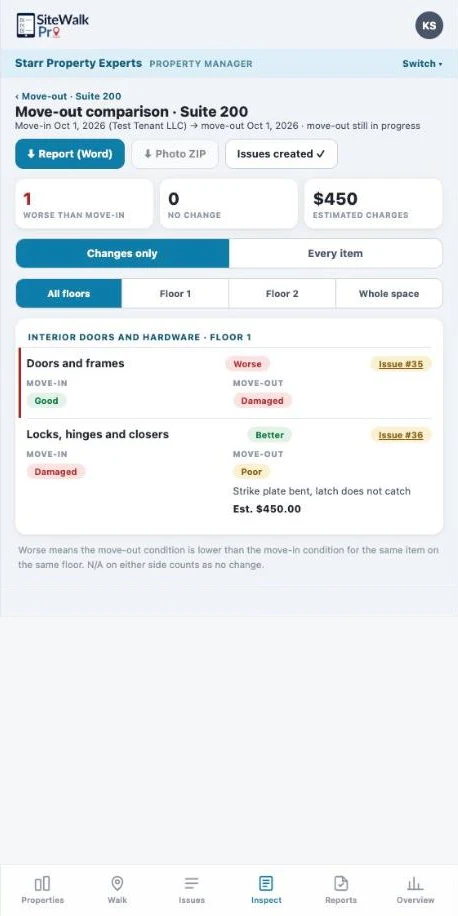
- Compare with the move-in puts the two inspections side by side, item by item, with each side's condition, note and photos. Changes only is the default view, because the list a landlord acts on is the items that got worse; Every item shows the full record.
- Report (Word) prints it under your logo: a summary block, the items that got worse first with both sides' photos, floor maps with numbered pins, then the full checklist. A completed move-in prints the same way as a condition report.
- Photo ZIP downloads every photo from the inspection (or from the move-in and move-out together), foldered by inspection, section and item, for the file or the attorney.
- Create issues turns anything that got worse, or was graded poor or damaged, into ordinary issues on the property, each under the category you choose so it lands in the right bid packet. The inspector's note becomes the scope, the issue remembers which checklist item it came from, and it can't be created twice.
- Deposit statement (Word). On a completed move-out, type the deposit held, the forwarding address and any charges that aren't checklist items (cleaning, unpaid rent, office damage repair). The statement lists the deposit, each damage deduction with its move-in and move-out condition and note, the contents missing or damaged at their replacement cost and any replacement made during the tenancy, the other charges, the total, and the refund due or balance owed, with the disclosure and the signatures under it. Normal wear is never charged. Deliver it within the period your state requires.
- Open Inspect, pick the property, and find the space. Press Start an inspection, choose Move-out, and confirm the move-in it compares against.
- Walk the space with the checklist. Tap a condition for each item; add a note, photos and a pin for anything that isn't Good, and an estimated charge where you know it.
- Count the contents back in the Contents returned card: what was returned and what came back damaged. Anything short is charged at its replacement cost.
- Press Mark complete, then Compare with the move-in.
- Press Report (Word) for the document, Photo ZIP if the file needs the originals, and Create issues to hand the repairs to the bid packets.
- Back on the inspection, collect both signatures, fill in the deposit card, and press Deposit statement (Word).
Inspections don't use GPS. Pins are on the floor plan you uploaded, which is what a unit needs.
Overview
The desk view — what's piling up, what's aging, and what keeps coming back.
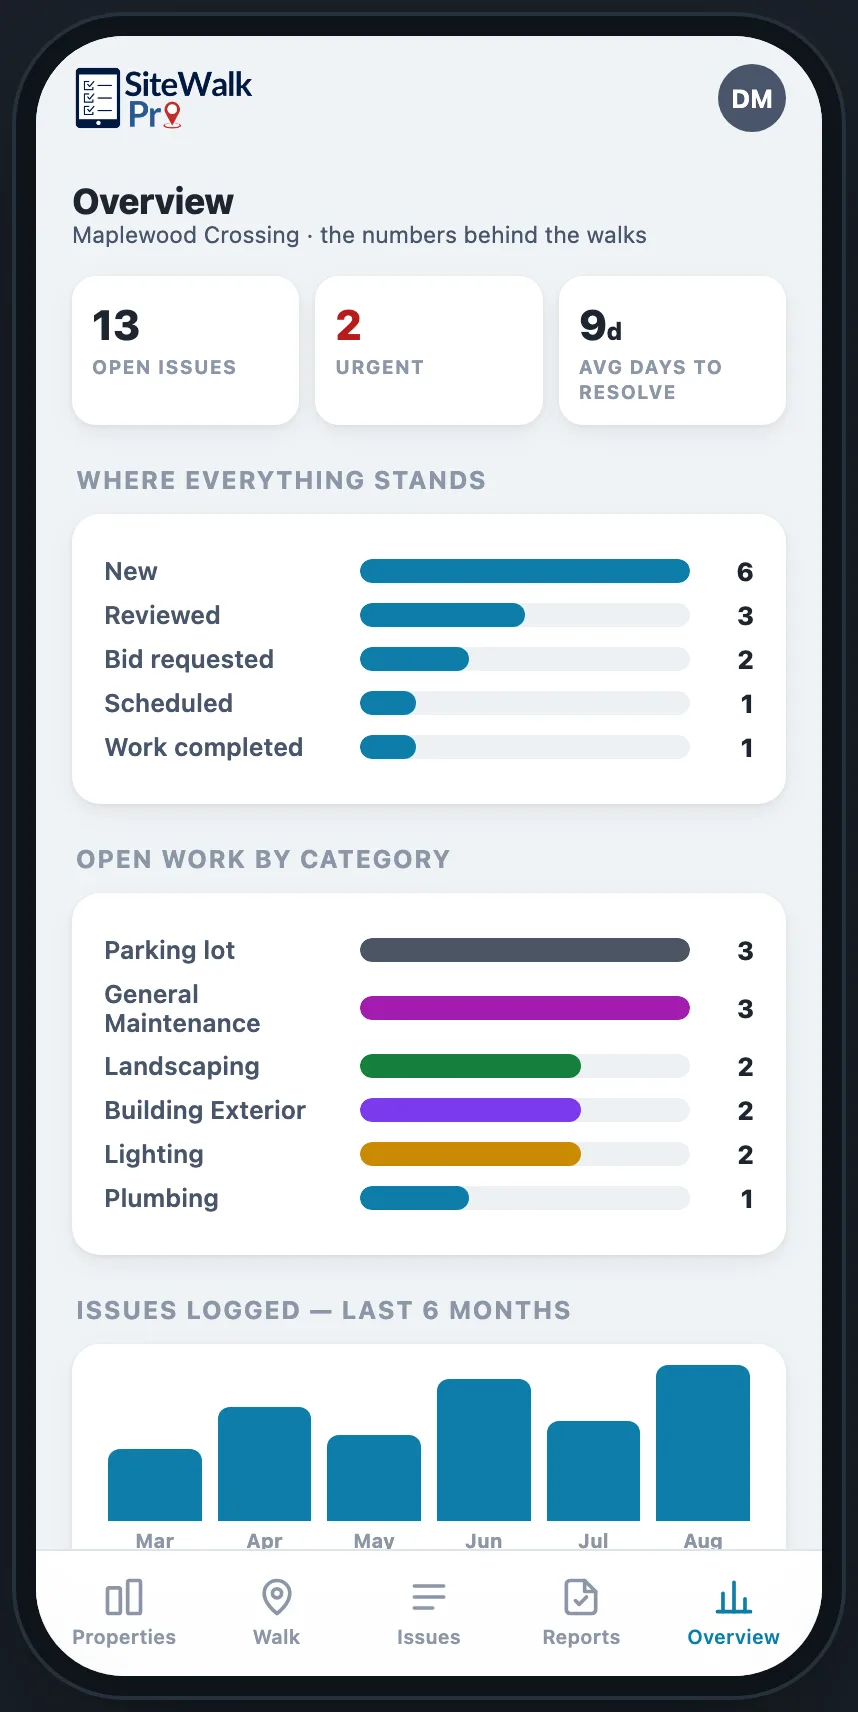

- Pick a property at the top and the whole page re-reads for it.
- Open issues, urgent items, median age, average days to close, repeat problems and budget-flagged counts.
- Open count for every category, each clickable through to a filtered list.
- The status funnel — where everything stands at a glance.
- Six-month trend and the oldest open issues.
- Repeat offenders grouped by wording, over 90 days, 12 months, or all time.
- CSV export and a print layout that carries the selected property.
- Open Overview and pick a property — or leave it on All properties for everything.
- Press ⬇ CSV. A spreadsheet of your issues downloads instantly — every column, ready for Excel or Google Sheets.
- Any document (Owner’s Summary, RFP, budget request) saves as PDF from its own screen.
Your records are always yours to take. A one-button full export — photos included — isn’t built yet; until it is, email info@sitewalkpro.com and we’ll assemble it for you.
People & access
Three levels, all enforced in the database. A bug in a screen can't turn into a leak.
| Can they… | Company admin | Property manager | Site staff |
|---|---|---|---|
| See every property | Yes | Theirs only | Theirs only |
| Add properties | Yes | Request it | Request it |
| Invite property managers | Yes | No | No |
| Invite site staff | Yes | To their properties | No |
| Change roles, remove people | Yes | No | No |
| Log issues, comment, add photos | Yes | Yes | Yes |
| Verify or close work | Yes | Yes | No |
| Send bid packets | Yes | Yes | No |
- Open your account page (your initials, top right).
- Press + Invite teammate.
- Enter their email, choose Property manager, and tick the properties they'll run.
- Press Create and send.
They arrive already managing that portfolio — no second setup step. A property manager inviting their own site staff sees only their own properties in the same list.
- As the company admin, open your account page (your initials, top right).
- Under Your data, press ⬇ Download everything (.xlsx).
- One workbook downloads: properties, team, every issue open or finished, and each issue’s photos embedded beside its row as thumbnails — the full-quality originals stay safe in the app.
Keep the file as your archive — Excel shows the embedded photos; Google Sheets may drop them when converting. The CSV exports on the Overview stay for spreadsheet work.
- Open your account page (your initials, top right).
- Scroll to How’s it going? near the bottom.
- Tap a mood if you like, type the thing, press Send feedback.
It goes straight to us with your name on it, and we answer — several features in this guide exist because someone typed one sentence into a box like this.
- Pending invitations can be emailed later with Email it — useful when someone prepares them and the admin sends them.
- A workspace can never lose its last manager or its last admin.
- Nobody can promote themselves.
- A company admin can reassign a property when a manager leaves, so nobody's portfolio walks out the door with them.
- One person can belong to several companies and switch between them.
- Instant alerts when an issue is logged, a status changes, someone is assigned, or a comment is added.
- A daily digest around 7am — open issues grouped by property, urgent first, with ages. Managers receive it.
- Send yourself the digest on demand from the Overview.
- Deliberately plain — no images, no marketing furniture. It's built to reach the inbox rather than the promotions tab.
Install it on your phone
SiteWalk Pro is a website, so there's no App Store, no download, and no update to chase — but it installs to a home screen and opens full-screen like any other app.
- iPhone: open the app in Safari → Share → Add to Home Screen.
- Android: Chrome offers Install in its menu.
- Desktop Chrome or Edge: the install icon at the right of the address bar.
- Safari on Mac: File → Add to Dock.
It opens without an address bar, gets its own icon, and behaves like an app — but it still needs a signal.
Where we fall short
Graded on SiteWalk Pro's own urgency scale, because holding the product to its own standard seemed fairer than a vague "known issues" list. Nothing here is hidden from you in the app — but you shouldn't have to discover it the hard way.
A walk with no signal is a lost walk
There is no offline capture. In a basement, a stairwell, or a rural site with no bars, you can't log an issue and come back to it — the app needs a connection at the moment you save. Photos retry, but only while something is reaching the network.
For now: log those on paper or in your phone's notes and enter them at the truck.
Deferred deliberately until a real site forces it — the groundwork is in place.History is loaded in pages, and filters only see what's loaded
The property list now counts in the database rather than downloading every issue, and the issue log loads open work in full but finished work 300 items at a time. That's what keeps a busy workspace fast — but it means searching or filtering while viewing history only covers the items already loaded. The log tells you when there are more, with a button to fetch them.
The Overview reads the last twelve months, which is as far back as any of its charts look.
Headroom moved from about 5,000 issues per workspace to well past 100,000.The morning digest is young
The 7am email had a history of not arriving, which is fixed: it now runs on a scheduler we control, tries three times each morning, and raises an alarm with us when a run fails. It delivered unattended every morning from 10 to 26 August; on the 27th GitHub's scheduler slipped by hours and one company briefly received a duplicate — the guard that allowed it is fixed, and a late scheduler now skips the day and alerts us instead of mailing a morning brief in the afternoon.
You can always send yourself the digest on demand from the Overview.
Tell us if a morning goes quiet.One promise in the privacy policy isn't in the app yet
The policy says you can export everything and delete your workspace. Export is now a button — Download everything on the admin’s account page produces one Excel workbook with every issue and every photo embedded. Deletion still means emailing us; we’ll honour it within the stated window, you just can’t press a button yet.
The published terms are also still awaiting an attorney's review.Pins made before 21 August don't know which view they belong to
Pins now record whether they were dropped on the aerial or the site plan, and each view draws only its own. Pins from before that change carry no such record, so on a property with both views an older pin still renders at its drawn spot on either one — which can be the wrong place on the view it wasn't made on.
One Move pin on the right view adopts an old pin into the new system for good.
Self-healing as pins are touched; new pins are always view-aware.Zooming the map can't reveal more detail
Satellite imagery for a typical block resolves to about 40 centimetres per pixel, and that's what we store. Zoom past it and the picture softens — the pins stay sharp, so it's still useful for aiming, but no amount of zoom will show you the crack itself. That's the imagery, not the app.
Upload a drone shot as a site plan where you need real detail.Properties are added one at a time
There's no bulk import. A portfolio of forty properties is forty passes through the same dialog — which is why an admin can delegate that job to an assistant.
Bulk paste is designed, not built.No reporting across companies
Each company is its own world. A firm with several offices can switch between them, but there's no roll-up view of everything at once. This only matters at multi-office scale.
Roadmap, and honestly priced into any deal that needs it.